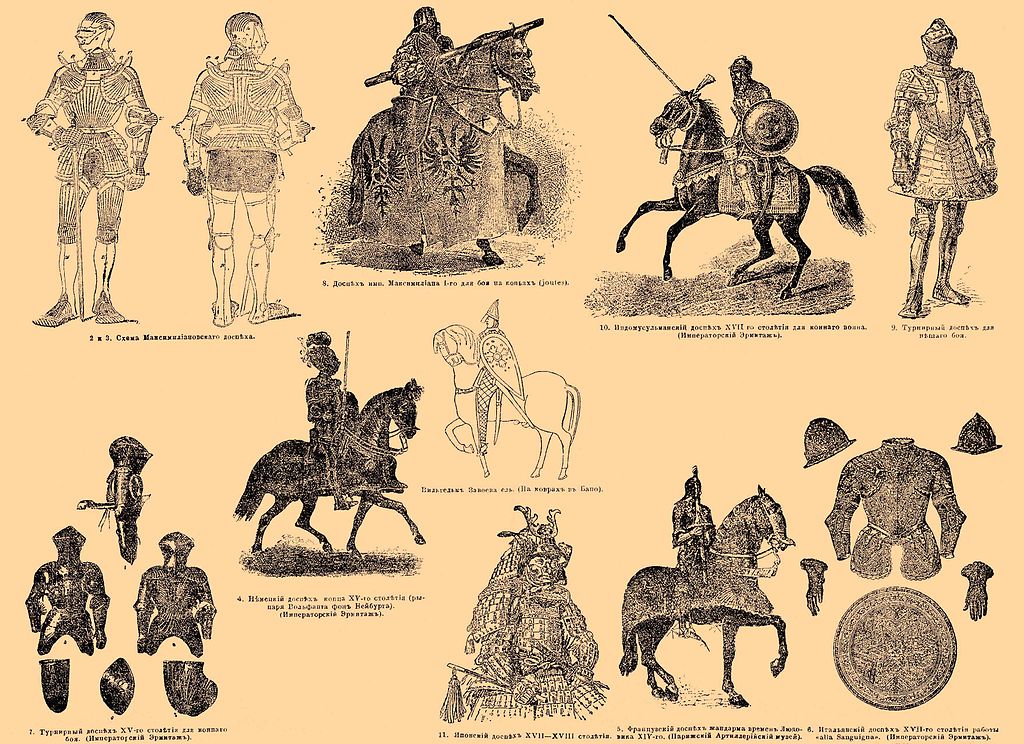
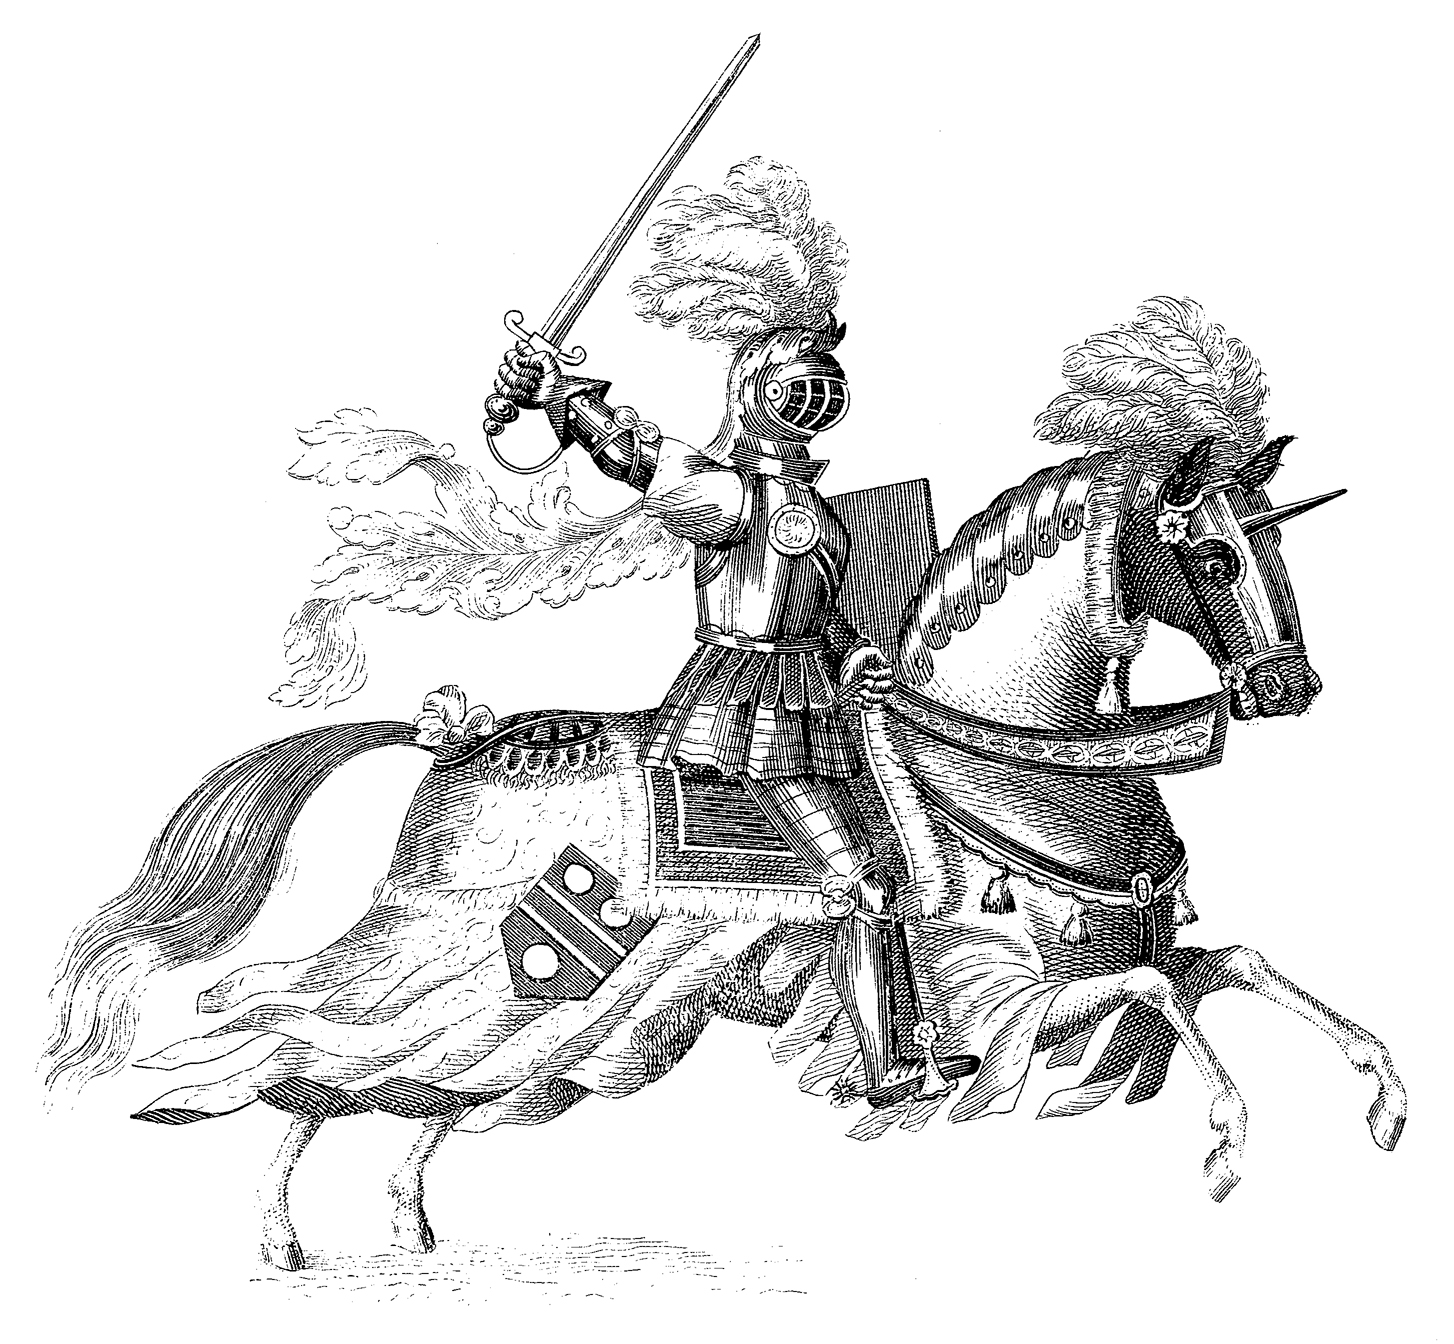
When people think of knights, they generally think of armor, too. The plate armor most associated with knights was actually a fairly recent invention. Armor started as quilted shirts and thick leather pieces to cover arms and legs (if you were fortunate enough to afford it!).
Chain maille was a pretty fantastic innovation for the time, but it had its drawbacks, too. It was heavy and cumbersome and only as strong as each individual link. Because the links were made of steel or iron, they rusted quite readily, and those rusty links were the proverbial “chinks in the armor.” They were points of weakness that might allow a sword point or arrow to penetrate.
The job of armor maintenance was given to young boys that might otherwise be underfoot. To start, the armor was placed in a barrel of sand and sealed up. The boys would then roll the barrels back and forth across the yard and the sand would scour the blood and sweat and rust off the links. Even a well-maintained chain maille shirt would need repairs quite often and the color on even the best of days would be a dull dark gray.
Further innovations led to the plate armor that we know today, but even then, it wasn’t always so shining. Here is a suit of armor that belonged to Henry VIII.


Beautiful? Yes. Well-crafted? Yes. Shining? Not so much.
Don’t be fooled into thinking that body armor like this was a strictly European invention. Most cultures that engage in warfare have some sort of armor to counteract the weapons. Some of the armor is ceremonial, but more often than not, it is clever and particular to the local environment.
The Maya and Aztec, for example, wore knee-length jackets of tightly-woven quilted cotton called ichcahuipilli. The jackets were soaked in salt water and then the water was allowed to evaporate. The salt left behind would crystalize between the quilted portions of the jacket, creating small, thick, sturdy plates of protection which were effective against arrows, atlatl darts, obsidian swords and batons.
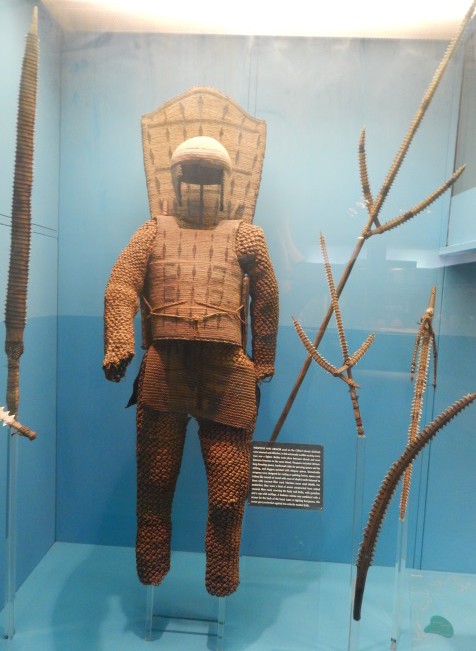
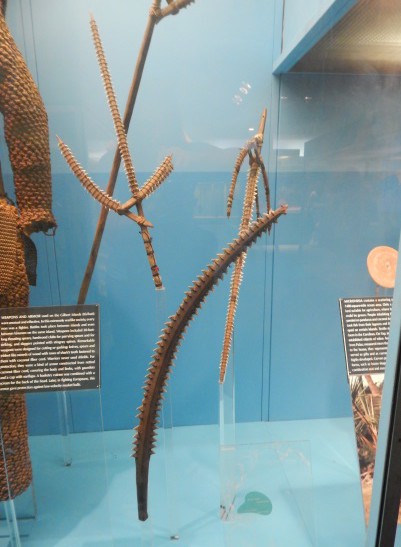
They didn’t have cotton in Micronesia, so on the islands of Kiribati, they used what they did have: coconuts. Helmets, leg coverings, shirts and chest protection were made from tightly-woven coconut fibers as protection against another natural resource: sharks (or more accurately, shark teeth). The teeth of the sharks were drilled in the roots and then attached to the base with bits from the veins of the coconut leaf or human hair. The shark-tooth swords were intended to disembowel an enemy or open a major artery so he would bleed out. Yikes!
Want in on all this exciting armor action? You’ve got two options!
Option 1: Bring your crew down to see Magna Carta before it leaves on August 17th. You have three short weeks! If you want to bring a school group or day care, be sure to contact fieldtrips@hmns.org to get the school rate. You will also want to consider coming on a Friday mornings at around 11.

Option 2: Can’t make it to us? Then try your hand at making your own armor. Sort of. Here’s a pretty easy chain maille bracelet you can make at home. It won’t offer you much protection but it will allow you to practice your technique before trying something a little more complicated.
Materials:
-Jump rings or chain maille rings (The bigger they are, the less work for you.)
-The clasp of your choice or a piece of leather or ribbon to tie the bracelet ends together
-2 pairs of jewelers pliers (or needle-nosed pliers if you are in a pinch)
-A tape measure or piece of paper to measure your wrist
Procedure:
- Measure how long you want your bracelet to be using a tape measure (or even a piece of paper). The standard size for women is about 7 inches and the standard size for men is about 8.
- Open several of your jump rings. To open them, you DON’T want to pull them apart. Instead you want to twist them open. If the individual rings start off as an “O” shape, you don’t want to make them into a wide-mouthed “C”. Instead, you want to slide the ends away from each other, one towards you and one away from you. Because of the way the rings are made, they naturally take that shape, so that should help you get started. If your rings lay flat when opened (rather than in a twisty shape), you will need to try again! Once you have a pile of open rings, things get a little trickier. You can keep up though. I believe in you.

- The next step is to put four closed rings on an open ring and then slide the open ring back into the closed position. Then repeat this step over and over. You will need probably 10 of these 4-in-1 sets for a 7-inch bracelet.


- Once you have the 4-in-1 sets made, you will need to use your pliers to separate out two rings from the four. The set should hang from your pliers as two rings, with one ring in the middle and two more rings at the bottom. You are then going to feed an open ring through the top two rings. Shift your pliers around so that you are now holding onto that open ring.


- Using your other set of pliers, pick up two rings on another 4-in-1 set. Loop those two rings through the open ring (effectively creating a new 4-in-1 set) and then close the open ring. You should have created a small chain at this point. Great job!

- Repeat steps 4 and 5 until you have 4 or 5 small chains. I am doing 4, but I have pretty small wrists.

- Getting close to being done! You will need to link these small chains in exactly the same way you did the sets. Take two rings from the top of one small chain and put them on an open ring with two rings from the top of another small chain.
- Now, repeat step seven with your longer chains!
- Finish up by adding a single jump ring to each end. This will let you tie the two ends together, or you can add a clasp to that last ring before you close it up. You’re done!