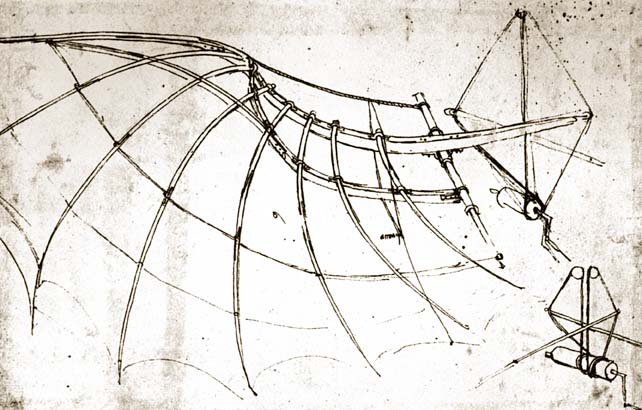
Bats have frightened, awed, and inspired for millennia. Leonardo da Vinci used the bat’s amazing wing structure as inspiration for his version of the ornithopter — a machine which flies using flapping bird-like wings. No one knows for sure if he ever built or tested his invention, but Cardanus, a contemporary of Leonardo wrote that he had tried, “in vain”, to get the orinthopter aloft.
Here is a version of Leonardo’s creation that you can try your hand at constructing and flying. Our version is technically a glider, but looks much the same as Leonardo’s ornithopter design.
Materials:
- Cardstock copy of orinthopter template
- Large plain craft stick
- Paper clips – large and regular size
- Craft glue
- Scissors
- Scotch Tape ™
- Markers
- Thin hemp-type string
- 18th inch hole-puncher
- Bat specimen or pictures of bats
- Picture of Leonardo’s orrnithopter
Building the Ornithopter:
- Display the picture of Leonardo’s ornithopter and discuss how he came up with the design idea after spending a great deal of time observing birds.
- Study the bat specimen and/or bat pictures. Compare and contrast the bat wings with the ornithopter wings: Are the wings more bird-like or bat-like?
- Color a large craft stick using a brown marker.
- Color the wings and tail on the orinthopter template and carefully cut out the pieces.
- Give the wings shape by closing the small V-shaped notch on each wing so that both pieces touch and then securing on the underside with transparent tape.
- Using craft glue, attach the wing and tail pieces to the craft stick as illustrated by the picture below. Allow time for the glue to dry.
- Next, bend the wings up along the large V in the wing pattern and carefully crease.
- Use a 1/8th inch hole-puncher to make small holes just to the inside where the wings were taped to give them shape.
- Use a piece of thin string to create a loop through the holes with a loose knot to secure it in place. This serves to keep the wings from spreading too far and to adjust the wings up when tightened.
- It’s time to test the ornithopter! Make different sized paper clips available. Use these to properly distribute the weight of the ornithopter for better flight.
- Spend time re-engineering the after the primary test flight.


