

If you’re at home with a kiddo who has sensory sensitivities, it can be difficult to find new things to do. Here are a few activities that we’ve found to be helpful for students who we’ve met at HMNS! If your kiddo also loves to visit HMNS, but isn’t able to at the moment, we have some great suggestions for how to discuss and learn more about your favorite exhibits and artifacts. Take a look at the lesson plans below, get creative, and have fun! You could even pair these activities with one of our virtual tours.
The activities below are customizable for any age/mental age. You may also substitute the materials list with almost anything – have fun and get creative!
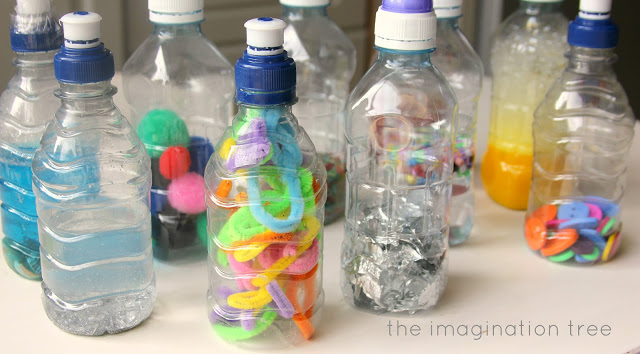
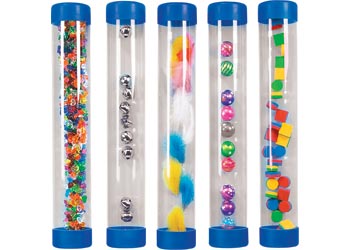
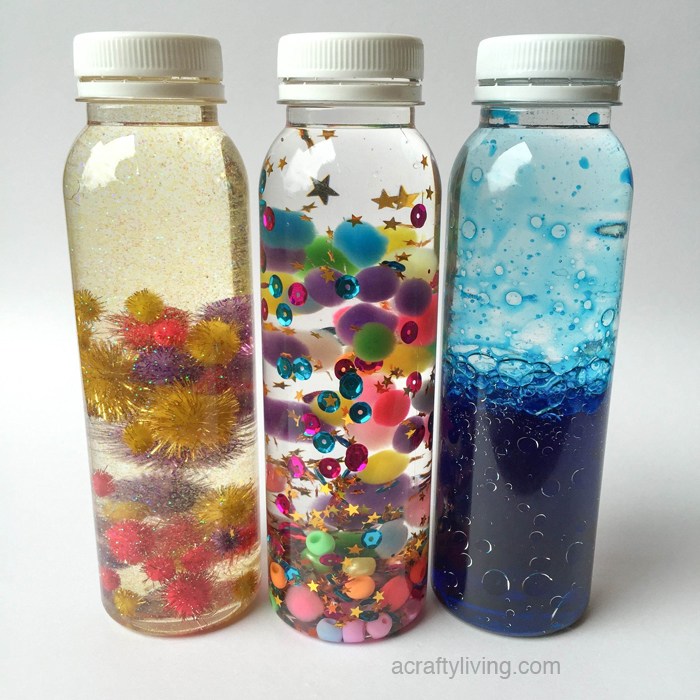
Sensory Tubes
Materials
- Plastic tubes that can be sealed on both ends (6-12 inches long) – 1 per person
- If you’re looking for an economical and readily available option, old water bottles work well!
- Hot glue sticks and hot glue gun
- Baby oil or corn syrup (one 20 oz. bottle is enough for 15 6-inch tubes)*
- Water
Customizable Materials
- Glitter
- Sand (plain or colorful)
- Beads
- Shells
- Gemstones
- Miniature dinosaurs
- Bells
- Feathers
- Felt pieces
- Clear, plastic containers to display participant’s supply choices – 1 bin per option
- Mugs or heavier cups – 1 on each table
* Liquid can be used so materials float, or you can exclude the liquid and make sight and sound tubes!
Prep to do Before Activity
- Decide if you want the participants to relate their Sensory Tubes to a specific exhibit/ lesson connected to the Houston Museum of Natural Science or if you want them to create generic Sensory Tubes.
- Divvy out materials into containers for participants to choose from. They can also be divided into multiple smaller containers so each table of participants has a choice of each option.
- If you have tubes with openings on both ends, pre-glue one end of each person’s tube shut by filling the bottom of one of the caps with hot glue and securing the tube into the cap while the glue is still hot. If you are using water bottles for your tubes, you can skip this step.
Procedure
- Explain that participants are creating Sensory Tubes as a tactile tool that relates to the Houston Museum of Natural Science. Sensory Tubes are used to channel focus by being a calming “fidget” that participants can have with them while learning new things. Ask participants to think about their favorite exhibit at HMNS, and make a Sensory Tube that reminds them of that exhibit.
- Give each person a tube with one end open and one end pre-glued shut.
- Provide the participants with the containers of materials to choose from and a mug or cup at the center of their table. This mug will be used to stand the tube upright, with the opened end at the top. If you are using water bottles as your tubes, you will not require a mug or cup.
- Have participants pick what materials they want to use to fill their tubes. If needed, assist them in filling the tubes with the appropriate amount (enough material to be visible, but not so much that the items cannot move around). Multiple items may be chosen for one tube – let them have fun with it! If they choose to put multiple items in the tube, it is helpful to stand the tubes upright in the mug or cup at the center of the table while gathering additional materials to add. That way, the tubes won’t roll away or spill.
- Once the participants are happy with the items they’ve chosen for their Sensory Tubes, call them up one by one to bring their tubes to you.
- Fill each tube with liquid (half water, half baby oil or corn syrup) if the person would like. Reminder: You may refrain from using liquid if you or the participant would prefer to have sight/sound tubes.
- Use the hot glue gun to glue the open end shut. This can be done by filling the bottom of one of the caps with hot glue and securing the tube into the cap while the glue is still hot.
- Hold tube upright until glue dries.
- Ask each participant to describe what they put in their tubes and how it relates to the exhibit hall that they chose.
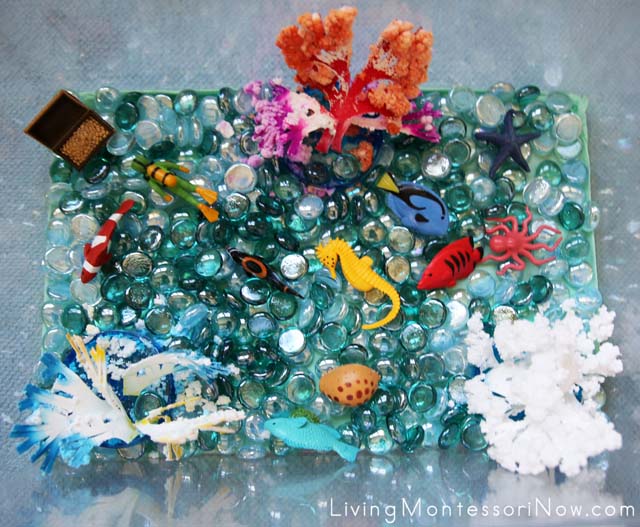
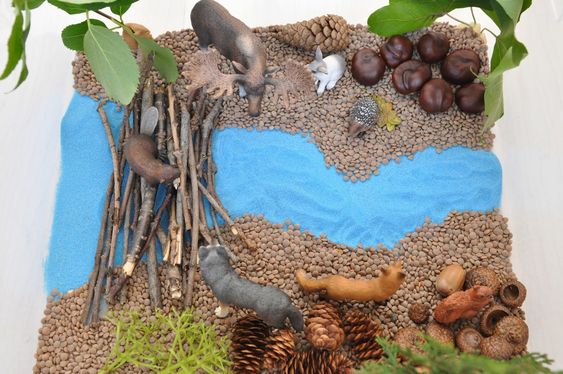
Sensory Friendly Bins – Ecosystems
Materials
- 6 – 8 clear, plastic bins of any size for however many different ecosystems you’d like to create based on the ecosystems represented at HMNS (or any other institution of your choice)
- Bags of different substrates to fill the bins. Examples specific to HMNS bins:
- 1 bag of sand (Egypt or Paleontology)
- 1 bag of small rocks (similar to rocks used in an aquarium) (Texas Wildlife)
- 1 bag of cotton balls (Artic)
- 1 bag of miniature shells (Malacology)
- 1 bag of small, plastic insects (Butterfly Center)
- 1 bag of feathers (African Wildlife)
- 1 bag of beads (Hall of Americas)
- 1 bag of clear, blue marbles (Texas Coastal Ecology)
- Dirt, beans, pom-poms, and rice are also great options!
- Miniature items for each ecosystem or culture – get creative! Strips of linen for Egypt, plastic animals, tools, shells, bells, keys, dinosaurs, flowers, etc.
Prep
- Plan out what substrate and which items you’d like to have in each bin/ecosystem.
- Fill each bin with the substrate of your choice.
- Add the miniature items of your choice to each “ecosystem” or “culture.”
- Lay the bins out on a counter or floor space that is accessible to the participants.
Procedure
- Show the participants the bins you’ve created.
- Inform them that you’re going to introduce a few ecosystems to them that they might see at HMNS.
- Ask the participants to come explore the bin that you’re going to be focusing on first.
- Have them pull out one item and describe what they discovered. Continue this process until most items in the bin have been uncovered.
- Ask participants what ecosystem they believe they’re exploring and why they think you all chose those specific items for the ecosystem.
- Discuss each item’s importance, the make-up of each ecosystem, and if you’ve already been to visit that exhibit at HMNS, any memories from their visit.
- Repeat this process with each bin/ecosystem.
We hope you enjoy these activities, and look forward to having you back at the museum soon. HMNS at Hermann Park is now open. Visit our website for details.