By Kim Vera, Membership Copywriter at HMNS
Have you checked the calendar lately? With Mother’s Day fast approaching finding that perfect gift might be more challenging than you thought it would be.
But no worries, Sip and Shop is back! Once again HMNS is offering an evening of shopping, crafting and overall fun with our spring Sip and Shop event!
Browse and shop our gift shop – Members will receive a 25% discount – regardless of Membership Level! After choosing the perfect gifts, have fun with some colorful spring time crafts. Use them to decorate your gift bags, or as a fun rainy day project with the kids. Enjoy complimentary drinks and a food truck while you shop during this Members-only shopping event!
Get creative and have fun, shop for mom or treat yourself this spring at HMNS!
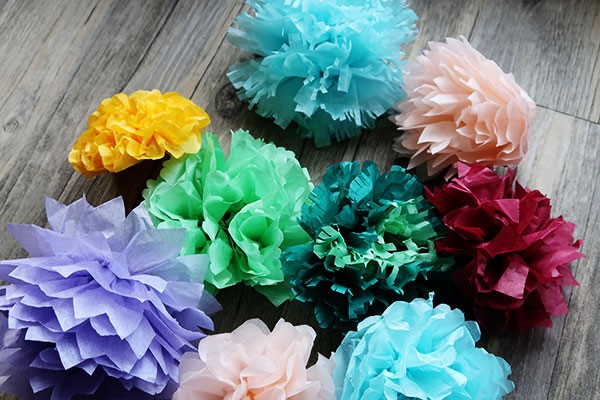
This tutorial is just one of the many fun crafts we will share with you during our spring Sip and Shop. Follow along with us and create your own small tissue paper flowers. Perfect for embellishing wreaths or gift wrapping. Look forward to crafts like this and more!
Materials:
- Tissue Paper (assorted colors)
- Scissors
- Wires/twine/string
Step 1:
Cut the tissue paper into rectangles. The smaller the rectangles, the smaller your finished flower will be. The sizes do not have to be perfect, each flower will come out differently.
Step 2:
Layer 5 or more sheets of tissue paper. However, the more layers you use the fluffier your flower will be. (Note: This tutorial uses 5 sheets, more sheets would be recommended for larger flowers.) Once you have layered the sheets begin by folding the sheets in an accordion fold. Again, this does not need to be perfect.
Step 3:
Once folded, bind the sheets with some thin wire or twine. Wire is recommended to makes it easier to connect your flower to a larger project such as a wreath, gift wrapping, headband, or garland.
Step 4:
Cut the edges. There are several ways you can do this. Here are a few ways to get you started. Be creative! Each edge will create a different finished flower. (Note: You do not need any special scissors for this part.)
Step 5:
Fan out one of the sides. Here you can cut edges if they did not come out in the way you wished. But keep in mind, even raw edges would give the flower some texture. (Pictured: single scallop edge)
Step 6:
Pull each sheet up individually. When pulling each layer, do so carefully since they can easily tear.
Step 7:
Repeat on the other side until each layer is fluffed. Now your flower is ready to use or display.
Alternate Option:
Combining edges and layering different colors of tissue paper is also something you can do to spice up the flowers. Pictured is a flower with green and mint paper with the edges scalloped and then cut using the fringe technique.
Even though the colors are only slightly different shades, the finished flower has more texture and it’s a great way to add to the color scheme.
This fun DIY is a great craft for kids! Use the flowers to make fun flower crowns, add it to a gift bag for embellishment, or just to hang around the house. You name it! We can’t wait to see you on May 3rd for our spring Sip and Shop!


